Plane Mirror
A plane mirror is a flat mirror with a reflective surface that allows you to see your reflection. Learn about why you see your reflection.
Diffuse Reflection
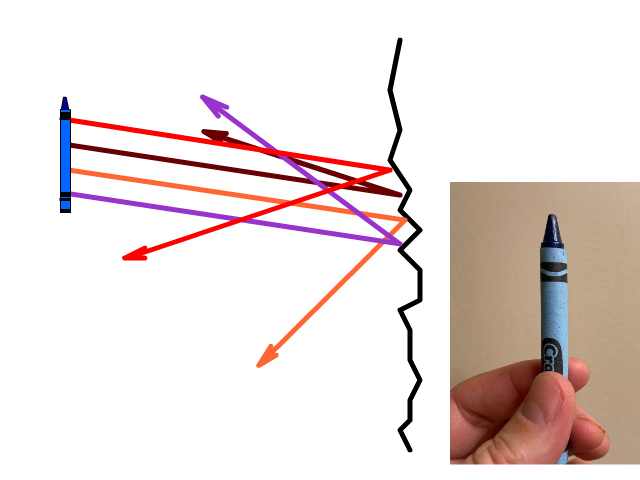
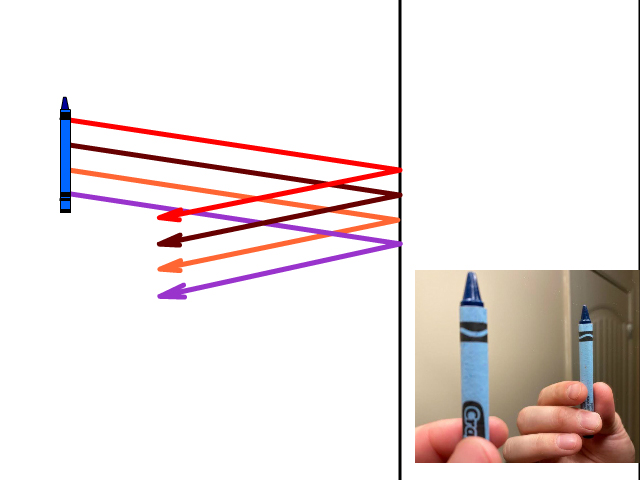
When you see an object it is the result of millions of rays of light coming to your eyes in an orderly fashion. In our model, we are only following four rays of different colors to observe their reflection off a wall.
A wall is rough at the microscopic level and the reflection diffuse. Diffuse means that the rays of light are reflecting off the rough surface in random directions. The rougher a surface, the more diffuse the reflection, and the harder it is to see a reflection.
Planar Reflection
A planar reflection occurs off a smooth flat surface like a mirror. With planar reflections, rays of light bounce off a smooth flat surface at the same angle. The orderly reflected rays of light results in you seeing a reflection.
Types of Mirrors
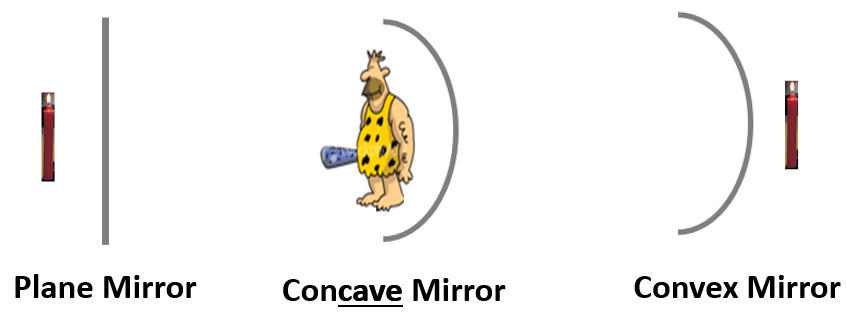
Other types of mirrors include concave mirrors and convex mirrors.
- Concave mirrors have their sides bend toward the object as if the object was in a cave.
- Convex mirrors have their sides bend away from the object.
Questions
1. What type of a mirror is a regular one that you look at in a bathroom?
2. What type of a mirror would the surface of a spoon have if the side you would scoop something up with was facing you?
Plane Mirrors Reflection
Plane mirrors produce images that are:
- Virtual - image that appears behind the plane of the mirror.
- Upright - Top of what you see in the mirror is the same orientation as the top of the object
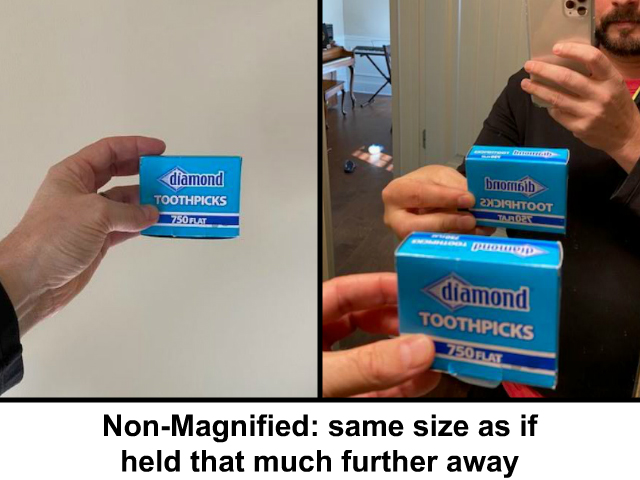
- Non-magnified - Appear the same size as if the object was that distance away
- Flipped Horizontally - Left is right and right is left. Try and read words in a reflection and you will see this.
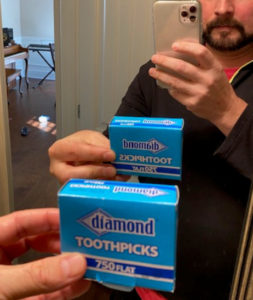
Non-magnified means that the image appears the same size as if it was a similar distance away. Rays of light have to travel a further distance to reflect off a mirror before traveling to your eyes. Since rays from the reflected toothpicks travel further, the toothpicks do look smaller but it is considered non-magnified. Non-magnified because the toothpicks do not look any bigger or smaller than they would if a similar distance away.
Plane Mirror Diagram Terms and Variables
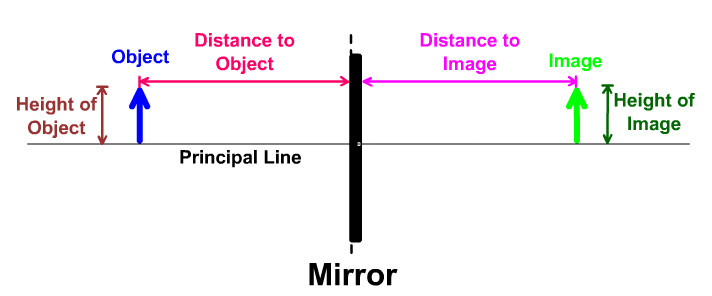
(do) distance to object
(di) distance to image
(ho) height of object
(hi) height of image
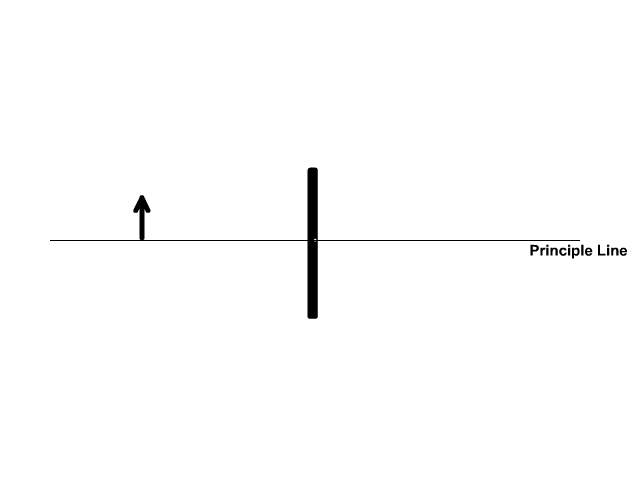
Principal line: Line that act like the ground and extends across the page horizontally. The base (bottom) of the object or image will always be on this line.
When making a ray diagram to determine the image produced with a lens or mirror, we start with a principal line drawn straight across the page horizontally. We place the mirror or lens perpendicular to this principle line in the center. Then we draw in an object. A ray diagram, you will see later, will lead you to determine the image created.
Real vs. Virtual Side
- Real Side: The side the object is on (your side if you are looking into a mirror)
- Virtual Side: The side that is not really there (beyond the mirror on the other side if you are looking at it)
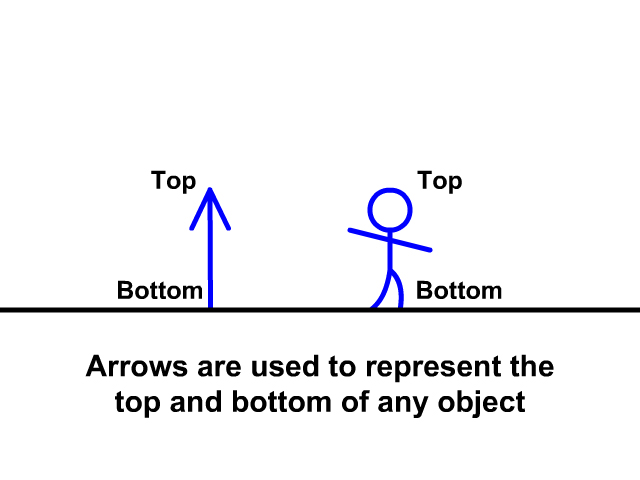
Arrows Represent Objects and Images
An arrow is used to represent any object or image produced since it has an arrow tip to represent the top and a bottom on the opposite end.
Drawing a Planar Ray Diagram
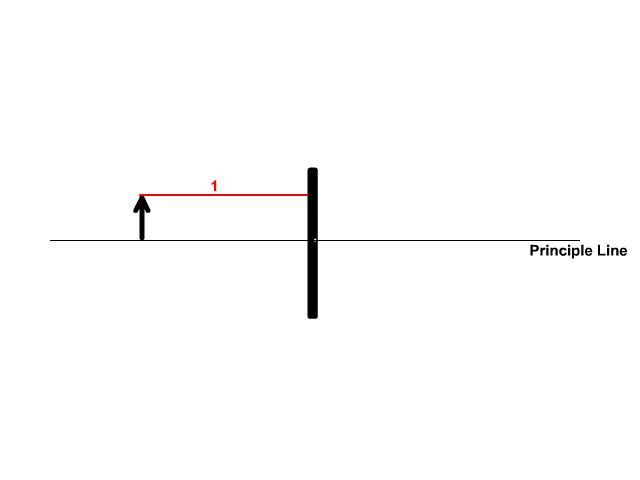
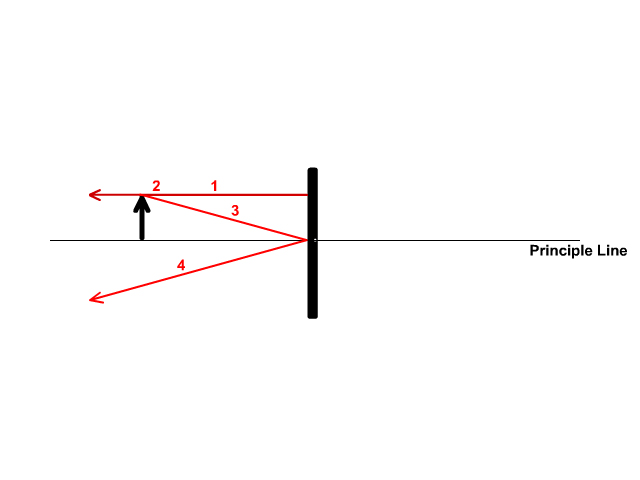
- Draw the first ray from the top of the object and parallel to the principal line to the mirrors surface.
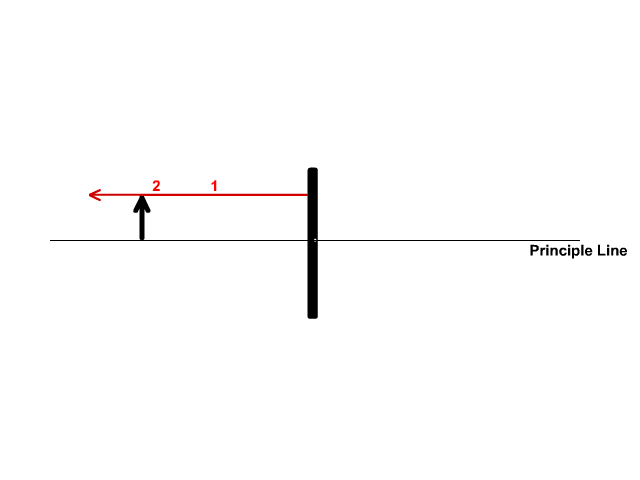
- Draw the reflection of this ray from the mirror directly back with an arrow tip only on the reflections end.
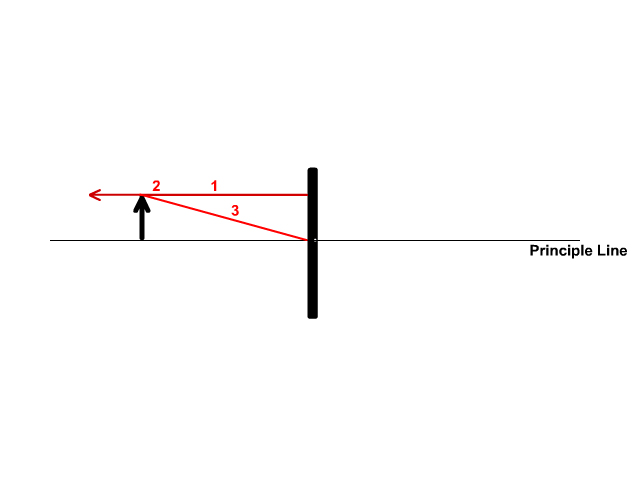
- Draw a second ray from the top of the object to where the principal line meets the mirrors surface.
- Draw the reflection back from the mirror at an angle equal to angle from the principal line and include an arrow tip on the reflections end.
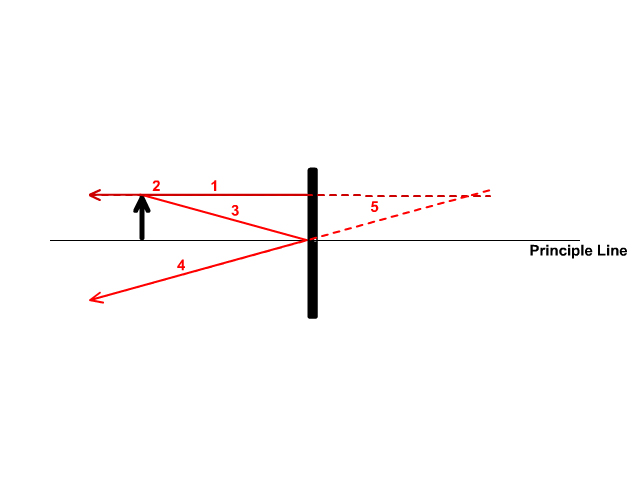
- Follow the reflected arrow heads (from step 2 and 4) back to the mirror. Since the rays don’t cross on the real side of the mirror, extend them until they meet on the virtual side.
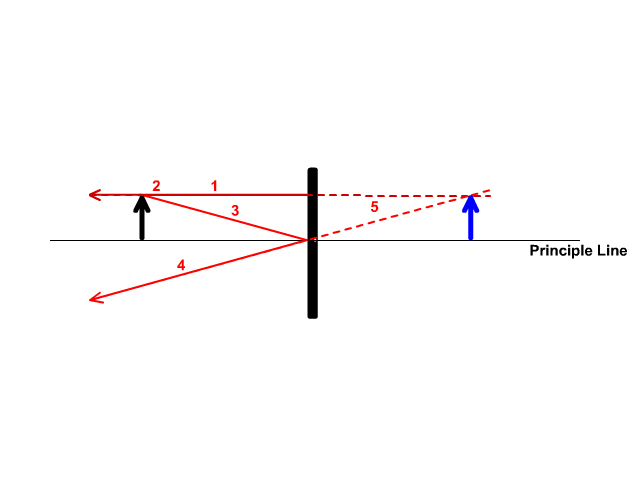
- Where the lines meet is where the image top would appear, draw the image, with the top being where the rays intersect and the bottom extended to the principal line.
The steps are shown in the video and in pictures below.
Analyzing the Ray Diagram
Ray diagrams can be drawn all one color with a pencil. We color coded the diagram to discuss a few things.
After you are done drawing a ray diagram you can analyze it to answer questions about the image.
Look at the image (blue arrow in the image) compared to the object (black arrow)
Upright: The blue arrow (image) is facing up like the black arrow (object)
Virtual: The blue arrow ends up on the virtual side of the mirror
Non-Magnified: The blue arrow is the same size as the black arrow
Questions
3. Is the object you see in the mirror here a real or virtual image?
4. Describe the image produced by flat (plane) mirrors?
Use the following picture for the next questions
5. What does hi, ho, di, and do represent in the picture above?
6. What is the line horizontally across (drawn in red here) called in a ray diagram?
Links
- To Lenses and Lens Ray Diagrams
- Back to the Main Electromagnetic Waves Page
- Back to the Stickman Physics Home Page
- Equation Sheet
